
Drip irrigation transforms Kenyan farms from water-guzzling operations into efficient, high-yielding enterprises. But choosing the wrong system wastes money. Installing incorrectly destroys crops. This guide covers everything you need: exact costs for every farm size, step-by-step installation instructions, maintenance schedules, and real ROI calculations showing when your investment pays back.
💰 Quick Cost Reference Guide
- 1/8 acre drip kit: KES 18,000-25,000 (kitchen gardens, small plots)
- 1/4 acre drip kit: KES 38,000-50,000 (typical smallholder vegetable farm)
- 1/2 acre drip kit: KES 75,000-95,000 (medium commercial vegetables)
- 1 acre drip kit: KES 100,000-185,000 (large vegetable or mixed crop farm)
- Installation labor (if not DIY): KES 15,000-30,000 depending on complexity
- Average payback period: 8-18 months through water savings plus increased yields
Understanding Drip Irrigation Costs in Kenya
Drip irrigation pricing confuses most farmers. Suppliers quote wildly different amounts for "similar" systems. Understanding what drives costs helps you avoid overpaying.
What Determines Your Drip System Price?
Farm Size: Larger farms need more materials but cost less per acre. A 1-acre system costs KES 100,000-185,000 while four separate 1/4-acre systems would total KES 152,000-200,000.
Drip Lines Per Bed: This single factor dramatically affects cost. Tomatoes need 2 drip lines per bed. Onions require 3-4 lines. More lines mean more material expense.
Emitter Spacing: Closer spacing (15cm) uses more emitters per meter than wider spacing (30cm). Onions and garlic need 15cm spacing. Tomatoes work fine with 30cm spacing.
Pipe Thickness: Drip tape comes in 0.3mm, 0.4mm, and 0.8mm thickness. Thicker pipes last longer but cost more. Short-season crops use 0.3mm. Perennial crops justify 0.4-0.8mm thickness.
Water Source Type: Gravity systems using elevated tanks cost less initially. Pump systems add KES 25,000-80,000 for pump plus ongoing fuel or electricity costs.
| Farm Size | 2 Lines/Bed | 3 Lines/Bed | 4 Lines/Bed | What It Covers |
|---|---|---|---|---|
| 1/8 Acre | KES 18,000-25,000 | KES 22,000-28,000 | KES 25,000-32,000 | Kitchen garden, small vegetables |
| 1/4 Acre | KES 38,000-50,000 | KES 48,000-62,000 | KES 55,000-72,000 | Typical smallholder vegetables |
| 1/2 Acre | KES 75,000-95,000 | KES 95,000-120,000 | KES 110,000-140,000 | Medium commercial operation |
| 1 Acre | KES 100,000-140,000 | KES 141,000-185,000 | KES 165,000-210,000 | Large vegetable or fruit farm |
📊 Price Includes:
Water tank connector, screen filter, main pipes (HDPE or PVC), sub-main pipes, drip lines with emitters, all fittings (connectors, valves, end caps), and basic installation guide.
Price Excludes: Water storage tank (KES 8,000-45,000 depending on size), tank stand (KES 5,000-15,000), water pump if needed (KES 25,000-80,000), installation labor if hiring professionals (KES 15,000-30,000), and transport to farm location.
Gravity vs Pump Systems: Cost Comparison
| Factor | Gravity System | Pump System |
|---|---|---|
| Initial Cost | Lower (no pump needed) | Higher (pump adds KES 25K-80K) |
| Operating Cost | Zero (no energy needed) | Ongoing (fuel/electricity) |
| Best For | Sloped farms, elevated tanks | Flat terrain, large farms |
| Pressure | Consistent if tank maintained | Adjustable and controlled |
| Maintenance | Minimal (just tank cleaning) | Regular (pump servicing) |
| Reliability | Very high (no moving parts) | Depends on power supply |

Step-by-Step Drip Irrigation Installation Guide
Professional installation costs KES 15,000-30,000. But handy farmers save this money through self-installation. The process takes 2-3 days for a 1/4 acre plot.
Tools and Materials You Need
- Tape measure (minimum 30 meters)
- Spade or jembe for digging trenches
- PVC pipe cutter or hacksaw
- Adjustable wrench set
- Ladder (for elevated tank connections)
- Spirit level (ensures even bed preparation)
- Marker pen (for pipe measurements)
- Teflon tape (for threaded connections)
Phase 1: Planning and Measurement
Step 1 - Measure Your Farm: Record precise dimensions of the area to be irrigated. Note length and width. Identify water source location relative to planting area.
Step 2 - Design Bed Layout: Plan bed arrangement. Standard bed width is 0.8-1 meter. Leave 0.4-0.5 meter pathways between beds for access. Calculate total number of beds.
Step 3 - Determine Drip Line Needs: Count how many drip lines you need. Multiply beds by lines per bed (2 for tomatoes, 3-4 for onions). Add 10% extra for mistakes and repairs.
Step 4 - Calculate Pipe Requirements: Measure main line route from water source to farm. Measure sub-main line length from main line to each bed row. Add 20% buffer for fittings and adjustments.
Phase 2: Site Preparation
Step 5 - Prepare Raised Beds: Create raised beds 15-30cm high. Use jembe to form ridges. Flatten bed tops with rake. Ensure beds are level using spirit level. Uneven beds cause water pooling.
Step 6 - Position Water Tank: Elevate tank 2-4 meters above highest irrigation point. Build stable stand using concrete blocks or metal framework. Tank must not wobble or shift.
For gravity systems, every meter of tank height above beds adds 0.1 bar pressure. Minimum 1.5 meters needed for drip systems to function.
Phase 3: System Installation
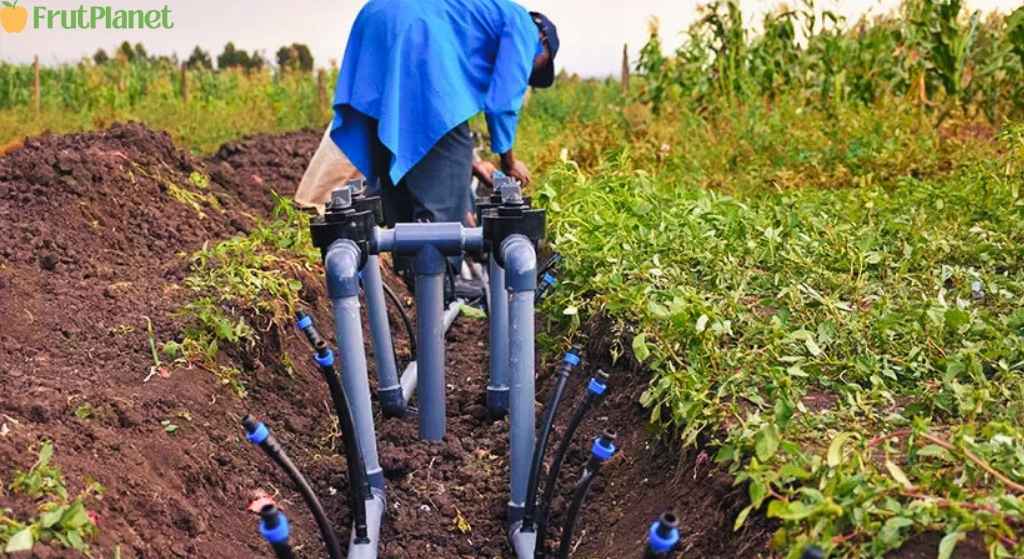
Step 7 - Install Tank Connector and Filter: Attach tank connector to tank outlet. Connect filter to tank connector using appropriate fittings. Tighten connections firmly but don't overtighten (causes cracks).
Step 8 - Lay Main Line: Run main pipe (1.5-2 inch diameter) from filter along farm perimeter. Bury main line 10-15cm deep in shallow trench. This protects pipe from sun damage and physical damage.
Step 9 - Install Sub-Main Lines: Connect sub-main pipes (1-1.25 inch diameter) to main line using tee fittings. Run sub-main perpendicular to main line. Space sub-mains so they reach across your bed rows.
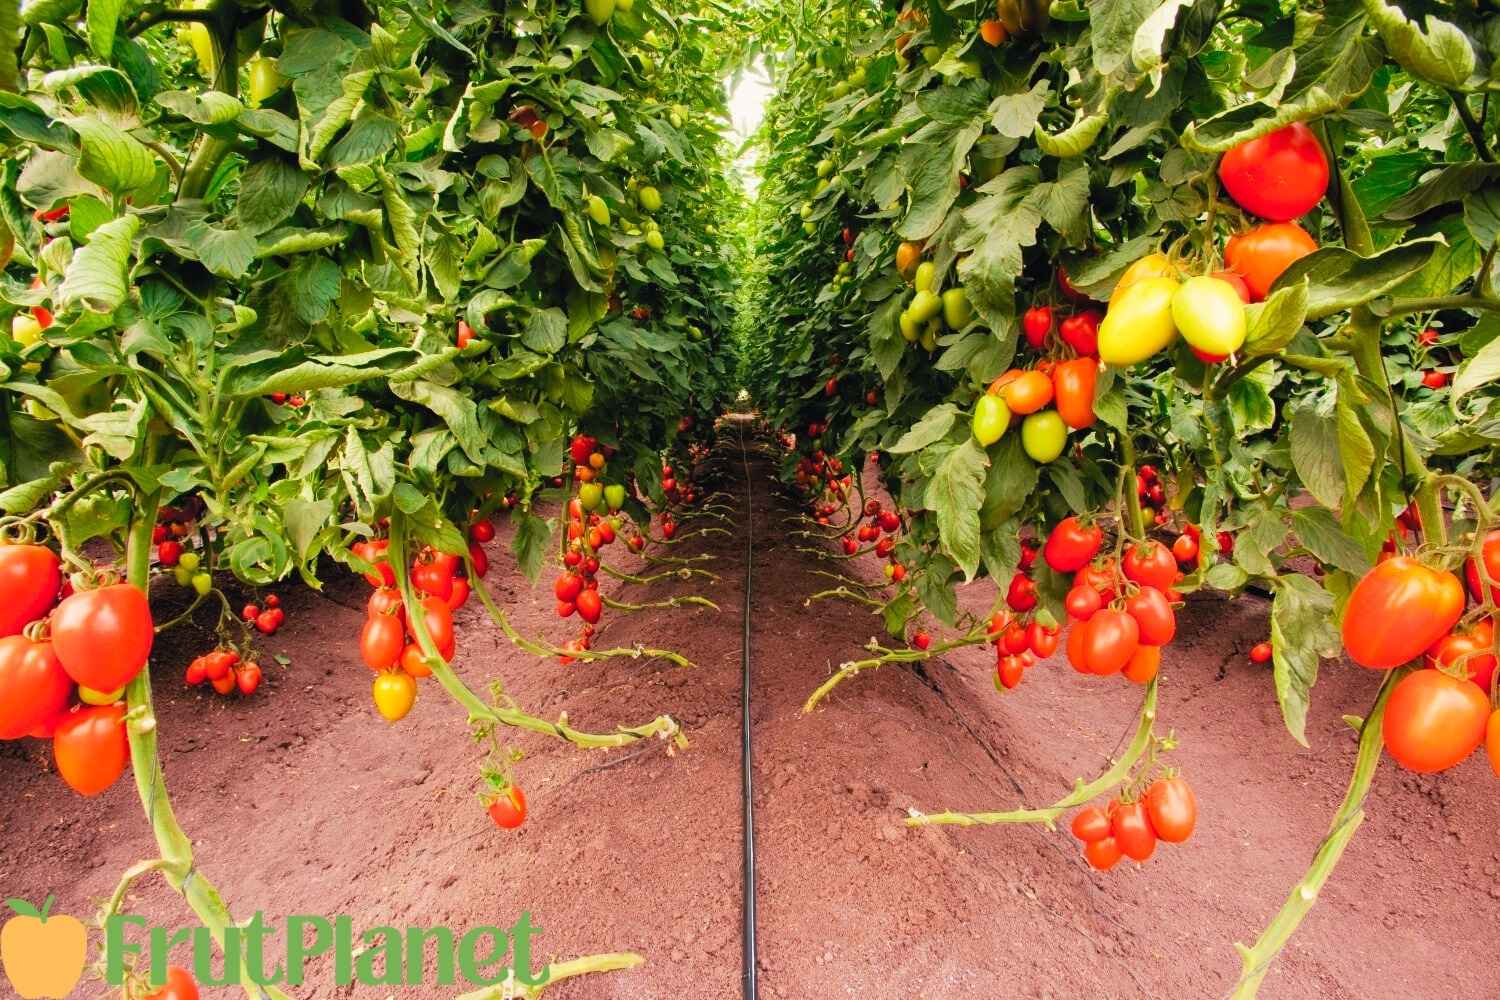
Step 10 - Connect Drip Lines: Unroll drip tape along each bed. Cut to bed length plus 20cm excess at ends. Attach drip line to sub-main using starter connectors. Ensure emitters face upward (emitters on top side of tape).
Step 11 - Seal System: Cap all drip line ends using end caps. Seal sub-main ends. Install ball valves on each sub-main section for zone control. This allows irrigating specific areas independently.
⚠️ Common Installation Mistakes to Avoid
Mistake 1: Beds not level - causes water to concentrate in low spots, drowning some plants while others get insufficient water.
Mistake 2: Insufficient tank height - results in weak pressure and poor emitter performance. Minimum 1.5m above beds required.
Mistake 3: Overtightening fittings - cracks plastic components. Hand-tight plus quarter turn is sufficient.
Mistake 4: No pressure testing - discover leaks after planting when fixing them damages crops. Test system before planting.
Mistake 5: Emitters facing down - causes clogging with soil and reduces water distribution efficiency.
Phase 4: Testing and Adjustment
Step 12 - Fill System and Test: Open main valve slowly. Watch for leaks at every connection point. Listen for hissing sounds indicating air leaks. Tighten any loose fittings immediately.
Step 13 - Check Pressure and Flow: Verify even water flow from all emitters. Test flow rate by timing how long emitters take to fill 1-liter container. Should take 30-50 minutes (1.2-2 liters per hour is standard).
Step 14 - Flush System: Open all end caps and run water for 5-10 minutes. This flushes manufacturing debris and sediment from pipes. Prevents immediate emitter clogging.
Step 15 - Mark Irrigation Zones: Label ball valves for different zones (Zone A, Zone B, etc.). Makes operation simpler. Create irrigation schedule showing which zones to water on which days.
Return on Investment Calculator
Drip irrigation costs significant money upfront. But savings accumulate quickly through reduced water usage, lower labor costs, and increased yields.
Real ROI Example: 1/4 Acre Tomato Farm
Initial Investment:
- Drip kit (2 lines per bed): KES 42,000
- 5,000-liter water tank: KES 18,000
- Tank stand: KES 8,000
- DIY installation (labor saved): KES 0
- Total Initial Cost: KES 68,000
Traditional Irrigation Costs (per season):
- Water (purchased or pumping): KES 12,000
- Labor for watering (3 hours daily × 90 days × KES 400): KES 108,000
- Yield: 3 tons tomatoes @ KES 60/kg = KES 180,000
- Net Profit: KES 60,000
Drip Irrigation Costs and Returns (per season):
- Water (40% reduction): KES 7,200
- Labor (minimal monitoring, 30 min daily): KES 10,800
- Yield (40% increase): 4.2 tons @ KES 60/kg = KES 252,000
- Net Profit: KES 234,000
Benefit Per Season: KES 174,000
Payback Period: 68,000 ÷ 174,000 = 0.39 seasons (about 4 months or 1 growing cycle)
✅ 3-Year ROI Projection
Season 1: Net KES 174,000 profit increase, System 61% paid off
Season 2: Net KES 174,000 profit increase, System 100% paid off (KES 280,000 cumulative profit)
Seasons 3-6: Pure profit of KES 174,000 per season = KES 696,000 over 2 years
Total 3-Year Return: KES 976,000 profit on KES 68,000 investment = 1,435% ROI
Crop-Specific ROI Highlights
| Crop Type | Yield Increase with Drip | Water Savings | Typical Payback Period |
|---|---|---|---|
| Tomatoes | 40-60% | 45% | 4-6 months |
| Onions | 35-50% | 50% | 6-8 months |
| Peppers | 45-65% | 40% | 5-7 months |
| Avocados | 30-40% | 55% | 12-18 months |
| Strawberries | 50-70% | 35% | 6-9 months |
Maintenance Schedule for Long System Life
Proper maintenance extends system life from 2 years to 5+ years. Neglected systems fail quickly. These tasks take minimal time but save thousands in replacement costs.
Daily Maintenance (During Growing Season)
- Check water tank level - refill before running empty
- Observe drip system operation for 5 minutes - look for unusual patterns
- Walk rows checking for broken drip lines or leaking fittings
- Verify even water distribution - all emitters functioning
Weekly Maintenance
- Clean filter screen - remove accumulated debris and sediment
- Check pressure - should remain consistent week to week
- Inspect main line connections - tighten any loosened fittings
- Flush end caps briefly - prevents sediment accumulation
Monthly Maintenance
- Full system flush - open all end caps and run water 10-15 minutes
- Inspect drip tape for damage - repair or replace damaged sections
- Check for algae growth in tank - clean if necessary
- Verify ball valves operate smoothly - lubricate if sticky
End of Season Maintenance
- Remove all drip lines - wash and dry completely before storage
- Store drip tape in shade away from sun exposure
- Drain main and sub-main pipes completely
- Clean and inspect all fittings - replace worn components
- Cover exposed pipes or remove and store
🔧 Troubleshooting Common Problems
Problem: Some emitters not dripping
Cause: Emitter clogging from dirt or algae
Solution: Flush system, clean filter, ensure water source is clean
Problem: Uneven water distribution
Cause: Incorrect pressure or air locks in pipes
Solution: Check tank height, flush lines to remove air, verify pressure
Problem: Drip lines bursting
Cause: Excessive pressure or sun damage to exposed tape
Solution: Reduce pressure, cover exposed tape with mulch or soil

Choosing the Right System for Your Farm
No single drip system fits all farms. Your choice depends on crops, budget, water source, and farming goals.
For Kitchen Gardens (1/8 Acre or Less)
Recommended System: Simple gravity kit with 10mm drip tape
Budget: KES 18,000-25,000
Best For: Sukuma wiki, spinach, kales, mixed vegetables
Why: Simple to install and maintain. No specialized knowledge needed. Immediate water savings visible.
For Small Commercial Vegetables (1/4 to 1/2 Acre)
Recommended System: Gravity or low-pressure pump with 16mm drip tape, 2-3 lines per bed
Budget: KES 38,000-95,000
Best For: Tomatoes, peppers, onions, cabbage, strawberries
Why: Professional results at reasonable cost. Rapid ROI through commercial crop sales. Scalable if farm expands.
For Large Commercial Operations (1+ Acre)
Recommended System: Pump-driven with pressure regulation, 0.4mm drip tape, automated valve control
Budget: KES 100,000-210,000
Best For: Large vegetable operations, greenhouse production, export crops
Why: Handles large areas efficiently. Automation reduces labor. Premium components last longer.
For Fruit Trees and Orchards
Recommended System: Individual emitter lines to each tree, thicker 0.8mm tape
Budget: Varies by tree count (approximately KES 400-800 per tree)
Best For: Avocado, mango, macadamia, citrus, coffee
Why: Long-term investment matching tree lifespan. Adjustable flow rates per tree. Deep watering promotes root development.
🌱 Get Expert Drip Irrigation Support
FrutPlanet helps Kenyan farmers choose, install, and maintain the perfect drip irrigation system for their farm. We provide subsidized drip kits, hands-on installation training, ongoing technical support, and guaranteed markets for your increased yields. Our farmers achieve 40-60% yield increases while cutting water costs in half.
Start Saving Water & Increasing Yields Today →Maximizing Your Drip System Performance
Installation completes only half the success equation. Operating the system correctly maximizes benefits.
Irrigation Timing and Duration
Best Time to Irrigate: Early morning (5-9 AM) before sun intensity peaks. Evening irrigation (6-8 PM) works but risks fungal diseases from overnight moisture.
How Long to Irrigate: Test soil moisture by digging 10-15cm deep near plants. Soil should feel moist but not waterlogged. Typical irrigation duration is 30-90 minutes depending on crop stage and weather.
Irrigation Frequency: Most vegetables need daily irrigation during dry seasons. Fruiting stage requires more frequent watering. Mature trees need irrigation every 3-5 days.
Water Quality Management
Preventing Emitter Clogging: Clean water is essential. If using river or dam water, invest in better filtration (sand filter for very dirty water, disc filter for moderately dirty water).
Dealing with Hard Water: High mineral content causes salt buildup in emitters. Flush system monthly with slightly acidic solution (add 1 liter vinegar per 100 liters water, run through system).
Algae Prevention: Cover water tanks. Clean regularly. Consider dark-colored tanks that prevent light penetration. Algae clogs emitters quickly.
Advanced Optimization Strategies for Maximum Efficiency
Basic drip irrigation saves water. But advanced techniques multiply benefits exponentially. These strategies separate high-performing farms from average ones.
Fertigation: Combining Irrigation with Fertilization
Fertigation delivers liquid fertilizer directly through drip lines. This precision feeding increases nutrient efficiency by 30-40%.
How Fertigation Works: Install fertilizer injection system between filter and main line. Mix water-soluble fertilizer in separate tank. System injects measured amounts during irrigation.
Benefits: Fertilizer reaches root zone precisely. No fertilizer waste from surface application. Continuous low-dose feeding matches plant uptake patterns. Labor savings from combined operation.
Best Fertilizers for Fertigation: Use completely water-soluble products. NPK formulations (20-20-20, 13-40-13), calcium nitrate for tomatoes, potassium sulfate during fruiting.
Safety Precautions: Never inject fertilizer before filter (causes clogging). Always flush system with clean water after fertigation. Monitor EC (electrical conductivity) to prevent salt buildup.
Mulching Combined with Drip Irrigation
Mulch over drip lines creates perfect growing conditions. Soil temperature moderates. Moisture retention improves 30-50%. Weed pressure drops dramatically.
Organic Mulch Options: Crop residues (maize stalks, bean stalks), grass clippings, coconut husks, rice husks, coffee husks.
Plastic Mulch: Black or silver plastic sheeting prevents weeds completely. Warms soil for early planting. Reflects light increasing photosynthesis. Lasts full season without degradation.
Application Technique: Install drip lines first. Cover with 5-10cm mulch layer. Ensure emitters remain accessible for inspection. Leave small gaps around plant stems.
Zone Irrigation for Mixed Crops
Different crops need different watering schedules. Zone irrigation allows independent control of separate areas.
Design Strategy: Install separate sub-main lines for each crop zone. Use ball valves to control each zone independently. Create irrigation schedule based on crop water needs.
Example Layout: Zone A (tomatoes) - irrigate daily 45 minutes. Zone B (onions) - irrigate daily 60 minutes. Zone C (fruit trees) - irrigate every 3 days for 90 minutes.
This flexibility prevents over-watering shallow-rooted crops while ensuring deep-rooted plants get sufficient moisture.
Common Mistakes Farmers Make and How to Avoid Them
Even experienced farmers make costly drip irrigation errors. Learning from others' mistakes saves money and frustration.
Mistake 1: Buying Based on Price Alone
The Problem: Cheapest kits use thin pipes (0.2mm) and poor-quality fittings. These fail within one season.
The Solution: Invest in minimum 0.3mm thickness for short-term crops, 0.4mm for season-long vegetables, 0.8mm for perennial crops. Quality fittings cost 20% more but last 3x longer.
Mistake 2: Incorrect Emitter Spacing
The Problem: Using 30cm spacing for onions leaves plants between emitters dry. Using 15cm spacing for tomatoes wastes money on unnecessary emitters.
The Solution: Match spacing to crop needs. Onions and garlic: 15cm spacing with 3-4 lines per bed. Tomatoes and peppers: 30cm spacing with 2 lines per bed. Watermelons: 30cm spacing with 1 line per bed.
Mistake 3: Ignoring Filter Maintenance
The Problem: Dirty filters reduce pressure. System performs poorly. Farmers blame drip lines when filter is the culprit.
The Solution: Clean filter screen weekly during growing season. Takes 5 minutes. Prevents 90% of emitter clogging problems.
Mistake 4: Over-Irrigation
The Problem: Farmers assume longer irrigation equals better results. Over-watering drowns roots, causes fungal diseases, leaches nutrients below root zone.
The Solution: Check soil moisture before irrigating. Dig 10-15cm deep. If soil feels moist, skip irrigation. Most vegetables need 30-60 minutes daily, not 2-3 hours.
Mistake 5: Poor Bed Preparation
The Problem: Uneven beds cause water pooling in low spots. Some plants drown while others remain dry.
The Solution: Use spirit level when preparing beds. Ensure bed tops are perfectly flat. Slight slope causes significant water distribution problems.
Seasonal Adjustments for Year-Round Success
Successful farmers adjust irrigation practices seasonally. Same irrigation schedule year-round wastes water or starves crops.
Dry Season Irrigation Management
Increased Frequency: High evaporation demands more frequent watering. Daily irrigation becomes necessary. Consider twice-daily irrigation during extreme heat.
Extended Duration: Deep watering during dry seasons encourages deep root growth. Increase irrigation time by 25-30% compared to rainy season.
Mulching Critical: Dry season mulching reduces evaporation dramatically. Bare soil loses moisture 50% faster than mulched soil.
Rainy Season Irrigation Adjustments
Reduced Frequency: Natural rainfall provides significant moisture. Monitor weather forecasts. Skip irrigation after heavy rains.
Drainage Preparation: Ensure beds have adequate drainage. Standing water plus drip irrigation causes root rot.
System Inspection: Check for leaks frequently. Rainy season softens soil, shifting pipes and fittings. Tighten connections as needed.
Crop Growth Stage Adjustments
Seedling Stage: Light, frequent irrigation keeps shallow roots moist. Water 15-20 minutes twice daily.
Vegetative Growth: Moderate irrigation encourages leaf development. Water 30-45 minutes once daily.
Flowering and Fruiting: Increased water demand supports reproduction. Water 45-60 minutes daily. Never stress plants during this critical stage.
Harvest Preparation: Reduce irrigation 5-7 days before harvest. Concentrates flavors in tomatoes, firms cabbage heads, sweetens onions.
Integrating Drip Irrigation with Other Farming Practices
Drip irrigation works best as part of comprehensive farming system. Integration with other practices multiplies benefits.
Greenhouse Drip Irrigation
Greenhouses demand precise moisture control. Drip irrigation excels in enclosed environments.
Special Considerations: Humidity control becomes critical. Over-irrigation in greenhouses creates fungal disease conditions. Greenhouses need 20-30% less irrigation than open fields due to reduced evaporation.
Automation Benefits: Timer-controlled systems maintain perfect moisture levels. Combine with greenhouse ventilation systems. Irrigate during coolest part of day.
Organic Farming Integration
Drip irrigation supports organic farming principles perfectly. Precision watering reduces disease pressure without chemical fungicides.
Organic Fertigation: Use compost tea through drip system. Mix well-aged compost in water (1:10 ratio). Strain thoroughly to prevent clogging. Provides nutrients while building soil biology.
Conservation Agriculture Compatibility
Minimum tillage systems work excellently with drip irrigation. Permanent beds with drip lines reduce soil disturbance.
Implementation: Establish permanent bed system with embedded drip lines. Replace only drip tape between seasons. Never disturb main and sub-main pipes. Add compost surface application rather than incorporation.
Troubleshooting Guide for Common Problems
Problems happen even with proper installation and maintenance. Quick diagnosis prevents minor issues becoming major failures.
| Problem | Possible Cause | Quick Fix |
|---|---|---|
| No water from emitters | Clogged filter or closed valve | Check and clean filter, verify all valves open |
| Weak water flow | Insufficient tank height or pressure | Elevate tank higher, check for leaks reducing pressure |
| Some beds get water, others don't | Air lock in pipes | Open end caps, run system until air purges completely |
| Drip lines bursting | Excessive pressure or sun damage | Reduce pressure, cover exposed tape with mulch |
| Uneven distribution along line | Elevation changes or pipe damage | Check for kinks, elevate low sections, replace damaged tape |
| Emitters clogging frequently | Poor water quality or inadequate filtration | Upgrade filter system, flush lines weekly, use cleaner water source |